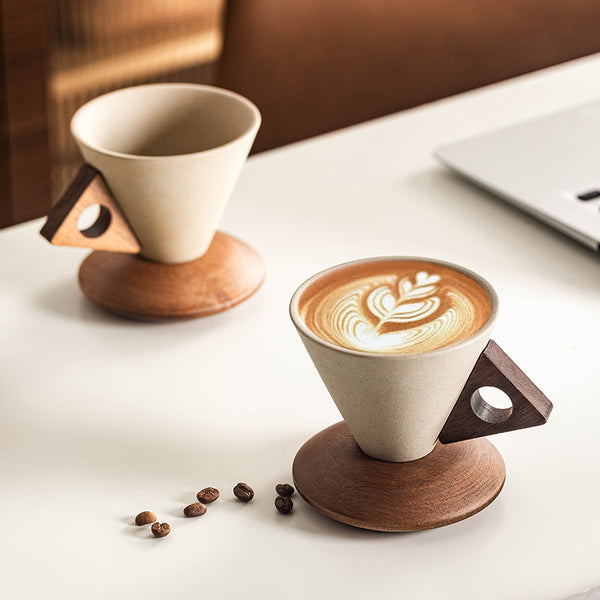
Latte Art at Home: Milk Frothing Technique and Pitcher Selection
Latte art is not a performance reserved for professional baristas. It is a physical skill with a clearly describable technique, and the barrier between a flat, bubbly milk surface and a glossy microfoam rosette is almost entirely a matter of understanding the physics of what heat does to milk proteins — and choosing equipment that does not work against you.
The Science of Microfoam: What You Are Actually Creating
When steam is injected into cold milk, two things happen simultaneously: the liquid heats and the proteins denature, and air is incorporated into the milk structure. The goal of professional milk texturing is not to create foam in the traditional sense — a pile of large, unstable bubbles that collapse quickly — but to create microfoam: a silky, velvety emulsion of air and milk where the individual bubbles are so small they are invisible to the naked eye. This microfoam has the consistency of wet paint and behaves like a liquid, which is what allows it to be poured in controlled streams to create latte art patterns.

The critical temperature window is 55 to 65 degrees Celsius. Below 55°C, the milk is insufficiently heated and the proteins have not developed the structure needed for stable microfoam. Above 65°C, you begin to burn the milk — the lactose caramelises and the proteins break down, producing a flat, slightly sweet flavour and foam that collapses almost immediately. A calibrated thermometer clipped to the pitcher's rim, or the simple technique of holding your palm against the pitcher's exterior and pulling away when it becomes too hot to hold for more than a second, are both reliable methods for hitting this window.
The Vortex: Your Primary Technical Goal
The vortex is the circular motion you see when milk texturing is executed correctly — a smooth, clockwise (or counterclockwise) rotation of the entire liquid mass around the steam wand tip. Achieving the vortex requires positioning the steam wand tip just below the milk's surface and slightly off-centre. Too deep and you get heat without air incorporation; too close to the surface and you get large, coarse bubbles that will never integrate. The moment the wand tip is correctly positioned, the milk begins to rotate and the surface develops a paper-thin layer of fine foam that is continuously folded back into the liquid.
Pitcher Design: Why the Tool Matters More Than You Think
A poorly designed pitcher makes the vortex difficult to establish and even harder to maintain. The most important variable is spout geometry. A sharp, pointed spout gives the barista precise control over the stream of milk during the pouring phase — it is the equivalent of the V60's gooseneck kettle. A wide, rounded spout diffuses the pour and makes controlled pattern-drawing nearly impossible.

Material matters equally. Stainless steel conducts heat predictably and allows the brewer to gauge temperature by touch — a skill that becomes intuitive after a few weeks of practice. Coated pitchers (including those with Teflon or ceramic interiors) offer easy cleaning but remove the tactile temperature feedback that professional baristas rely on. For learning purposes, a plain stainless steel pitcher is the superior pedagogical tool.
Volume selection is frequently underestimated. A 350 ml pitcher is ideal for a single espresso drink (one or two shots plus milk for a standard flat white or latte). A 600 ml pitcher allows for a larger beverage or two drinks from one texturing cycle. The 700 ml format with a standard taper and sharp spout is considered the operational sweet spot for high-volume café environments — it allows texturing a full flat white portion without excess milk that either cools too quickly or goes to waste.

"The pitcher is a drawing tool. The milk is the medium. The espresso is the canvas. Get the drawing tool wrong and the medium does not matter how refined it is."
Practice Protocol: From Beginner to Confident Home Barista
The fastest path to consistent microfoam is structured repetition. Begin with whole milk — its higher fat and protein content is significantly more forgiving than plant-based alternatives and produces more stable microfoam during the learning phase. Work exclusively on texture before attempting patterns: the goal for the first two weeks is a perfectly silky, glossy milk surface with no visible bubbles. Once texture is consistent, the pour pattern follows naturally from controlled wrist movement.
Practice the pour over a cup of water tinted with food dye before using a real espresso — this preserves your espresso shots while allowing unlimited pattern repetition. The heart, the simplest latte art pattern, requires one fluid continuous pour that starts centrally, moves backwards, and finishes with a forward pull. Mastery arrives sooner than most beginners expect, provided the pitcher and technique are correct. The rosette, tulip, and more complex designs follow from the same foundational motion, executed with progressively finer wrist oscillations.
Every tool in your coffee setup is a negotiation between control and forgiveness. The milk pitcher sits at the exact intersection of those two values — demanding enough to reward technique, democratic enough to reward consistent practice over natural talent.